Are you exhausted of tossing out coffee grounds, eggshells, and banana peels only to have them contaminate your trash? What if I told you that you could employ a horde of small, squirmy workers that never complain or demand raises to help you turn that rubbish into garden gold? So, Relax before you freak out at the notion of worms infiltrating your kitchen.
These little lads, earthworms, are low-maintenance. A DIY worm bin functions as a worm-sized hotel, converting scraps into rich, organic compost faster than you can say, “Ew, worms!”. You don’t need a lot of space — this project fits seamlessly into small apartments.
Are you prepared to give worms the room they are deserving of. Grab a bin, a power drill, and a good dose of humor. It’s DIY worm bin time. Here is a step-by-step way to accomplishing this:
Vermicomposting:
Vermicomposting is a sustainable composting technique in which worms break down organic waste to produce nutrient-rich compost. Unlike typical composting, vermicomposting uses worms—most frequently red wigglers (Eisenia fetida)—to expedite the breakdown process. These tiny creatures graze on food wastes, transforming them into a dark, crumbly substance known as “black gold” due to their astonishing capacity to improve soil quality. Vermicomposting not only lessens waste but also recycles it in the most environment friendly manner.
Vermicomposting has other advantages beyond its rapid turnover, including:
- Compact and Space-Saving: Tote Worm bins can be placed in backyards or apartments due to their compact size.
- Effective Composting: Compared to conventional composting techniques, worms break down garbage more quickly.
- Odor-Free Operation: When done correctly, the composter emits no foul smells.
- Eco-Friendly: It reduces household waste and helps recycle organic materials.
- Cost-Effective: You can build a worm composter using inexpensive materials.
Read more:– 👉 Benefits of Worm Casting (poops) in Houseplants
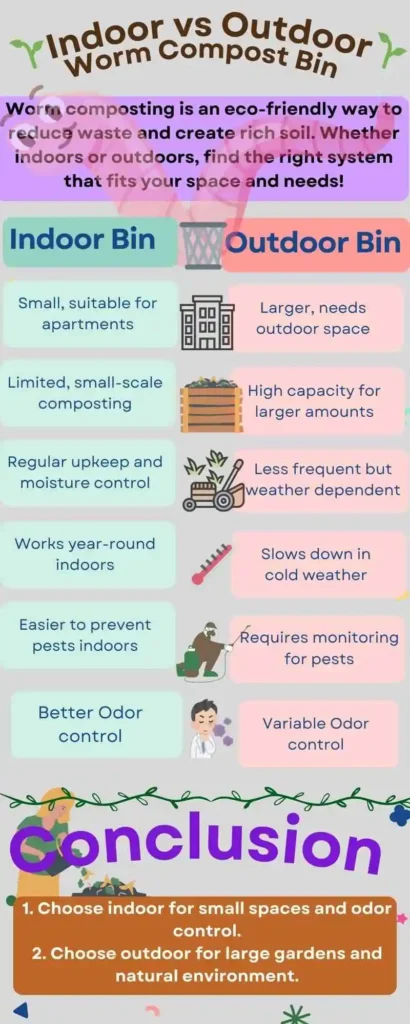
One of the biggest advantages of vermicomposting is its adaptability. It can be done indoors or outdoors, making it perfect for apartments, houses, or community gardens.

Indoors Worm Compost Bin
A tiny, odor-free indoor worm compost bin is excellent for anyone intending to compost food leftovers in a small space. These bins, which are ideal for apartments, households, and small offices, usually contain red wigglers to efficiently break down organic garbage. Because they are kept indoors, they are shielded from harsh weather and insects. Indoor bins require little maintenance if the proper moisture, ventilation, and worm-friendly bedding, are used. They generate nutrient-rich compost that is ideal for balcony gardening, tiny gardens, and indoor plants. Additionally, because they are discrete, everyone can easily and conveniently engage in sustainable composting.
Outdoors Worm Compost Bin
An outdoor worm compost bin is an excellent choice for individuals with additional room, such as a backyard or garden. These bins are perfect for homes with greater composting demands because they can accommodate bigger amounts of organic waste. The composting process may be accelerated by the bin’s exposure to the outdoors and natural factors. However, problems may arise from pests like ants or rodents, potential odors, and weather variations. To control moisture and temperature, outdoor bins require extra maintenance. Despite this, they produce plenty of rich compost, which can be used to fertilize vegetable patches, flower beds, or lawns.
Materials for a DIY Tote Worm Composting Bin:
Many of the components, needed to set up a worm composter, are probably already in your house. This is what you will require:

Essential Materials:
- Plastic Tote Bin: A large, hardy, opaque container (10–20 gallons) with a tight-fitting lid such as durable plastic storage tote . The size of the container should be determined by your demands, the quantity of waste, and the size of your garden. To keep light out of white buckets or containers, cover them with an old towel or tarp.
- Drill and Drill Bits: For making drainage and ventilation holes.
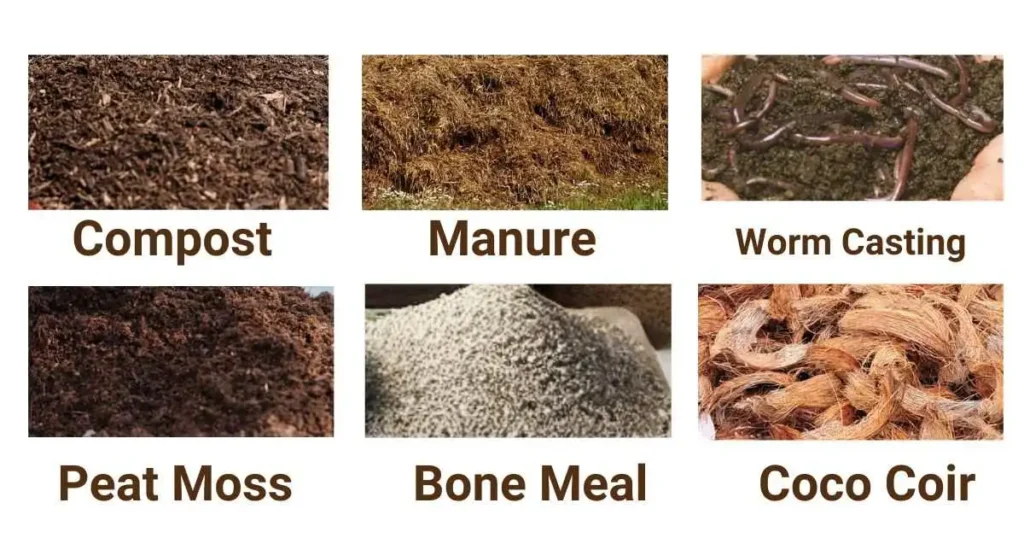
- Bedding Material: Cardboard, coconut coir, or shredded newspaper.
- Composting worm: red wigglers (Eisenia fetida) are the ideal worms.
- Food Scraps: Eggshells, coffee grounds, fruit scraps, and vegetable peels.
- Lid or small tray: To collect any extra liquid (worm tea) that drips out of the trash can.
- Garden Soil: Offers grit to aid in the digesting of worms.
Optional Tools
- Thermometer: To track the temperature of the bin.
- Spray Bottle: For controlling the amount of moisture.
- Paper bags or wire mesh: optional for drainage layers.
These basic materials guarantee that your worm composter is both cheap and efficient.
Step-by-Step Guide to Creating Your DIY Worm Bin

1- Setting Up the Bin
a- Drilling Ventilation Holes:
Drill 10-15 tiny holes on the lid to allow appropriate airflow. This allows light to reach the top of the soil surface while maintaining a healthy habitat for your worms. Because red wigglers detest light, this encourages them to stay sublevel and burrow deeply under the bedding. Make sure the holes are tiny enough to keep out rodents and other pests!
b- Drill Side Holes:
Make a series of holes spaced two inches apart across the bin’s upper edge.
c- Adding Drainage Holes:
Drill 8-12 holes in the bottom of the bin to prevent water from accumulating and rotting.
Optional:
- Worms can be prevented from escaping by lining the bottom with fine mesh.
- To catch any liquid runoff, place a second tote or tiny tray underneath the bin.
- Position the bin atop a few wooden or brick pieces. This removes extra liquid, preventing your worm bin from getting too wet.
2- Creating the Bedding
Types of Bedding Material:-
Excellent bedding options include cardboard, dried leaves, shredded newspaper, and coconut coir (optional). Then, Combine some soil with your organic waste (such as vegetable and fruit peels, crushed eggshells, coffee grounds, yard debris, etc.). Worms can decompose bedding materials more quickly if they are finer. Avoid glossy paper.
Moistening the Bedding:
Water should be sprayed until the bedding feels like a sponge that has been wrung out. This maintains the ideal conditions for worms as it needs moisture to survive. Test the moisture level by squeezing a handful of bedding; only drops should emerge.
Steps For Creating the Bedding:
- Add Bedding to the Bin: Fill the bin about 3-4 inches deep with damp bedding.
- Add Soil: To facilitate worm digestion, add a handful of garden soil on top.
3- Adding the Worms
When your bin and bedding are complete, it’s time to introduce the worms.
- Add Worms Gently: Add 1-2 pounds of red wigglers on top of the bedding.
- Let Them Settle: Worms will naturally burrow underground to avoid light because they detest it.
- Cover Them: To make them feel more safe, place a layer of moist cardboard or newspaper on top.
4- Feeding Your Worms
Worms prefer a variety of organic materials. The following are excellent choices:
- Vegetable Peels: Cucumbers, zucchini, carrots, and so forth.
- Fruit scraps include melon rinds, apple cores, and banana peels.
- Coffee grounds and tea bags: Provide nutrients and grit.
- Crushed eggshells: They aid in the digestion of worms while providing calcium.
The most challenging aspect is keeping your worms nourished, as they consume and multiply quickly.
What to Avoid Feeding Worms:
Certain foods can be harmful to your worms or attract pests. Avoid the following:
| Things to Avoid: | Reason |
|---|---|
| Meat, Dairy, & Oily Foods: | These can decay, produce noxious smells and attract pests. |
| Citrus Peels: | Your worms may suffer from the acidity. |
| Garlic & onions: | Too harsh for worms. |
Feeding Schedule:
- Frequency:- Feed your worms around once or twice a week.
- Amount:- Start with one to two cups of food scraps. Adapt to the worms’ rate of consumption.
- Method:- To minimize odors and discourage bugs, place the food beneath the bedding.
You can proceed as long as you maintain a consistent feeding schedule and keep your habitat healthy by maintaining the pH and moisture levels.
5- Maintaining Your Worm Bin:
a) Monitoring Moisture Levels:
A healthy worm bin depends on maintaining the proper moisture level. The bedding should feel damp but not soaked. Splash a little water if it’s too dry. If it is too wet, add dry bedding, such as shredded newspaper or cardboard, to absorb excess moisture. Your worms will remain healthy if you perform routine inspections and modifications.
b) Maintaining Proper Airflow:
Good ventilation keeps the worms active and minimizes unpleasant odors. Make sure the ventilation openings are unobstructed and clear. Stir the bedding occasionally to enhance oxygen flow and prevent the growth of anaerobic microorganisms. Proper aeration maintains moisture balance and facilitates the composting process.
c) Ideal Location, and Managing Temperature Conditions:
A temperature range of 55°F to 77°F (13°C to 25°C) is ideal for worm bins. Indoors, a kitchen corner, cellar, or garage works great. To keep the container from freezing in the winter, cover it with cardboard or blankets. Keep the bin away from heat sources and in the shade throughout the summer. Use icy water bottles, ice cubes, and additional airflow to cool it down if it’s too hot. Outdoor bins should be placed in a shaded area with sufficient airflow. To prevent infestations, avoid direct sunlight and timber constructions.
d) Odor Control Tips:
A healthy worm bin should not stink. If it occurs, limit food waste to avoid overfeeding. Dry bedding can be added to absorb extra moisture. To keep the surface from decaying, always bury scraps beneath the bedding. These simple measures will keep your worm bin clean and odorless.
6- Harvesting Worm Castings
Your worm bin will be laden with dark-colored, nutrient-rich worm castings after 2 to 3 months. A crucial step in getting the most out of your vermicomposting efforts is harvesting these castings. You can harvest your vermicompost using these two efficient methods:
Migration Method:
The migration method of harvesting begins with moving all the worms and compost to one side of the bin. Add food scraps and new bedding to the vacant side after that. This new bedding will entice the worms, causing them to migrate to the fresh side within the next 1-2 weeks. After the majority of the worms have shifted, you can collect the finished compost from the old side. Sift the castings using a DIY screen to remove any remaining worms or big particles. Both you and the worms will find this procedure easy and stress free. However, your efforts will be rewarded by high-quality vermicompost for your garden.
Dump and Sort Method:
If you prefer a more hands-on approach, the dump and sort method is ideal. The first step is to pour out everything from the bin onto a tarp. Next, create little cone-shaped mounds of compost. Worms will automatically burrow deeper into the piles because they abhor light. Gently use a garden trowel to remove the top layers of compost until only the worms are left at the bottom. Continue doing this until the majority of the castings have been harvested. After that, The worms should then be returned to the bin with fresh scraps and covered with damp newspaper. You can swiftly separate worms and undigested material with a sifting screen for efficiency. After harvesting, store the vermicast in a plastic container for use as a soil additive in your garden, potted plants, or seed startings. You will be able to routinely extract more compost as your worm population increases.
Final Tips:
| Tips | Details |
| Balance is Key | Keep food scraps and bedding balanced. |
| Regular Check-Ins | Check the worm bin weekly for issues. |
| Patience Pays Off | Vermicomposting takes time but is rewarding. |
The final Product, Vermicomposting/ Compost Tea, can be used for potted and lawn plants care
Why is there a bad odor?
Overfeeding or too much moisture in the worm composting bin causes bad odor. It can be reduce by add dry bedding and cut back on food.
Why are the earthworms escaping from composting bin?
Too wet or dry composting bin causes worms to escape. So adjust the moisture levels in the worm composting bin.
Why are there fruit flies around the composting bin?
Exposed Food scraps attracts fruit flies and other pests. Bury the food under the bedding.
Why is mold growing in the composting bin?
Too much food or moisture allow mold to grow. Reduce food and add dry bedding.


